Small Highland Waiting Room
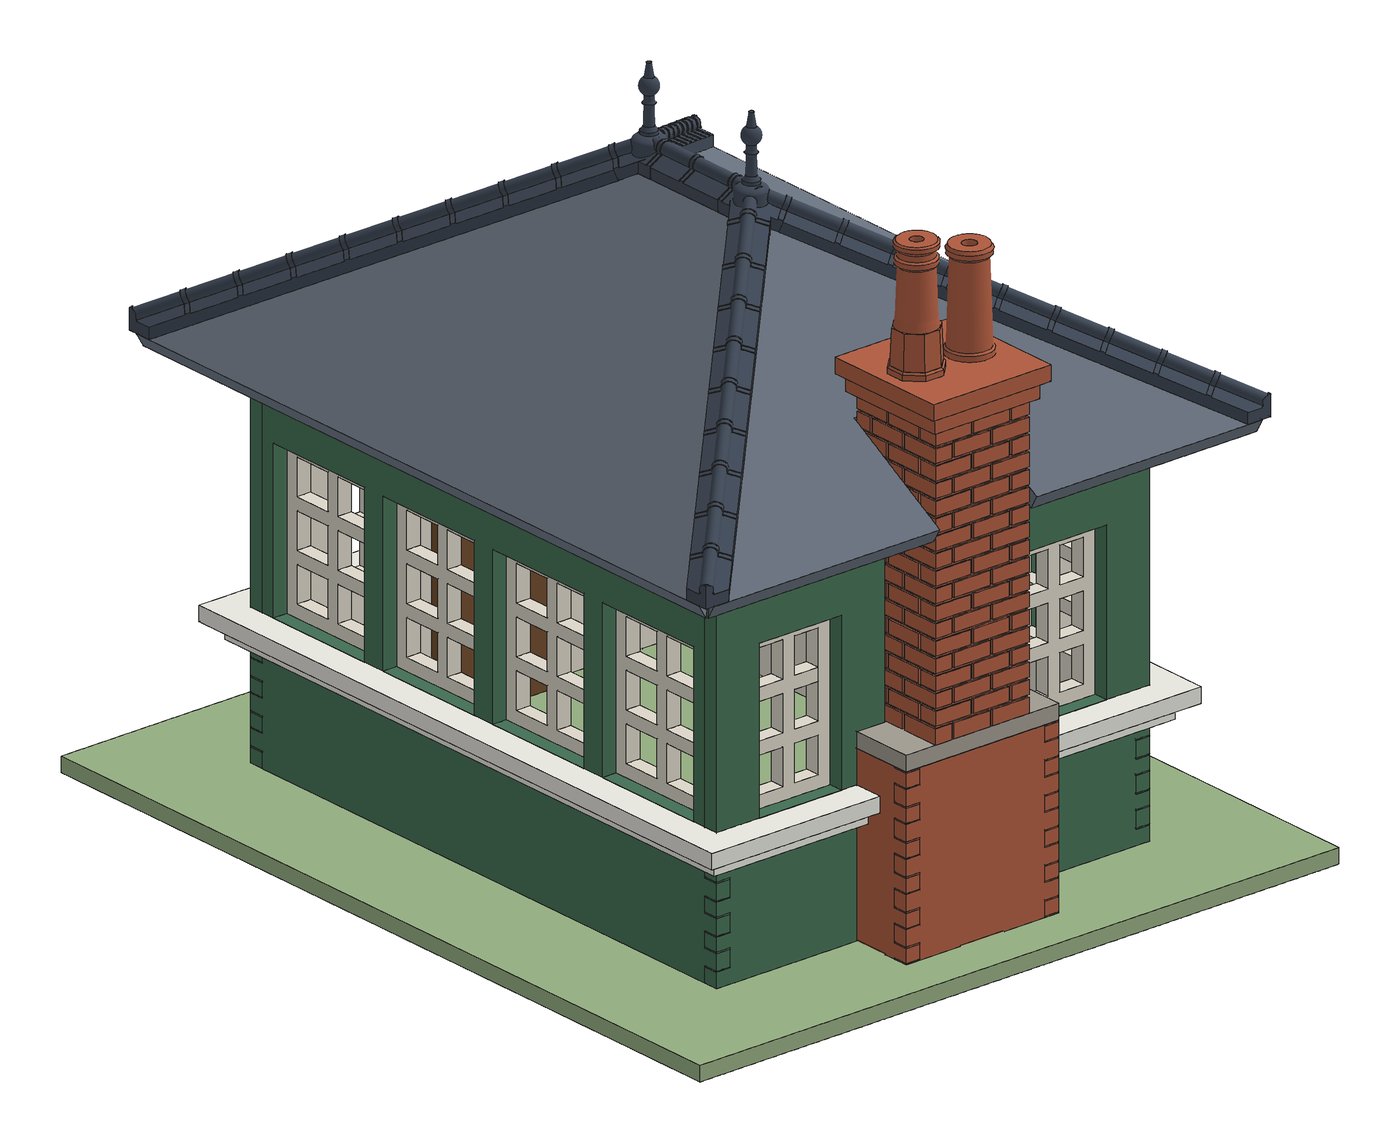
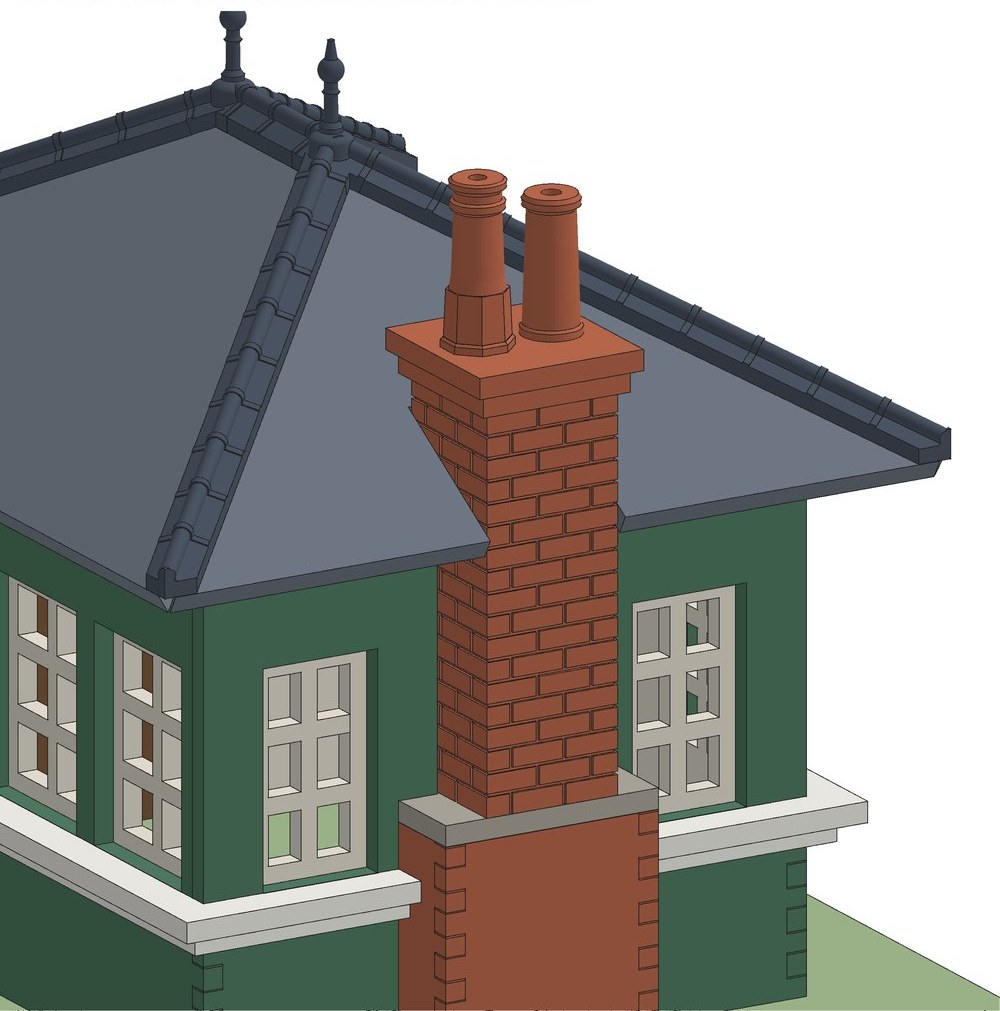
A small Highland station waiting room in the style of West Highland line waiting rooms, with a brick chimney, hipped roof and glazed walls.
- Scale
- TT120 (1:120)
- Footprint (base plate)
- 51.8 × 43.5 mm
- Laser-cut parts
- 34 (S01–S34)
- Glazing
- 6 pre-cut panes
- Resin
- Chimney stack with 2 pots
- Skill level
- TBC
Instructions version v1.0 · matches box revision A Placeholder
What's in the box
- 1 laser-cut sheet with 34 numbered parts (S01–S34), engraved brick and comb joints
- 1 clear glazing card with 6 pre-cut panes (G01–G06)
- 1 printed resin chimney stack with pots (fits after the roof is on)
- Quick-start card with QR code to this page TBC
Tools & glue you'll need
- Sharp craft knife with a fresh No.11 blade, and a cutting mat
- Fine sanding stick (400–600)
- Wood glue with a fine needle applicator. We use Deluxe Materials Laser-Cut Kit Glue (AD87)
- Clear glue for the glazing, such as Glue 'n' Glaze, Formula 560 or clear PVA
- CA gel for the resin chimney
- Tweezers and a small square
Instructions
Build it step by step
Older versions
None yet. When the kit changes, earlier PDFs stay listed here with the box revision they match.Draft Step summary adapted from the v11 instructions for the v12g kit. The final text and images will come from the v1.0 PDF.
Check the parts
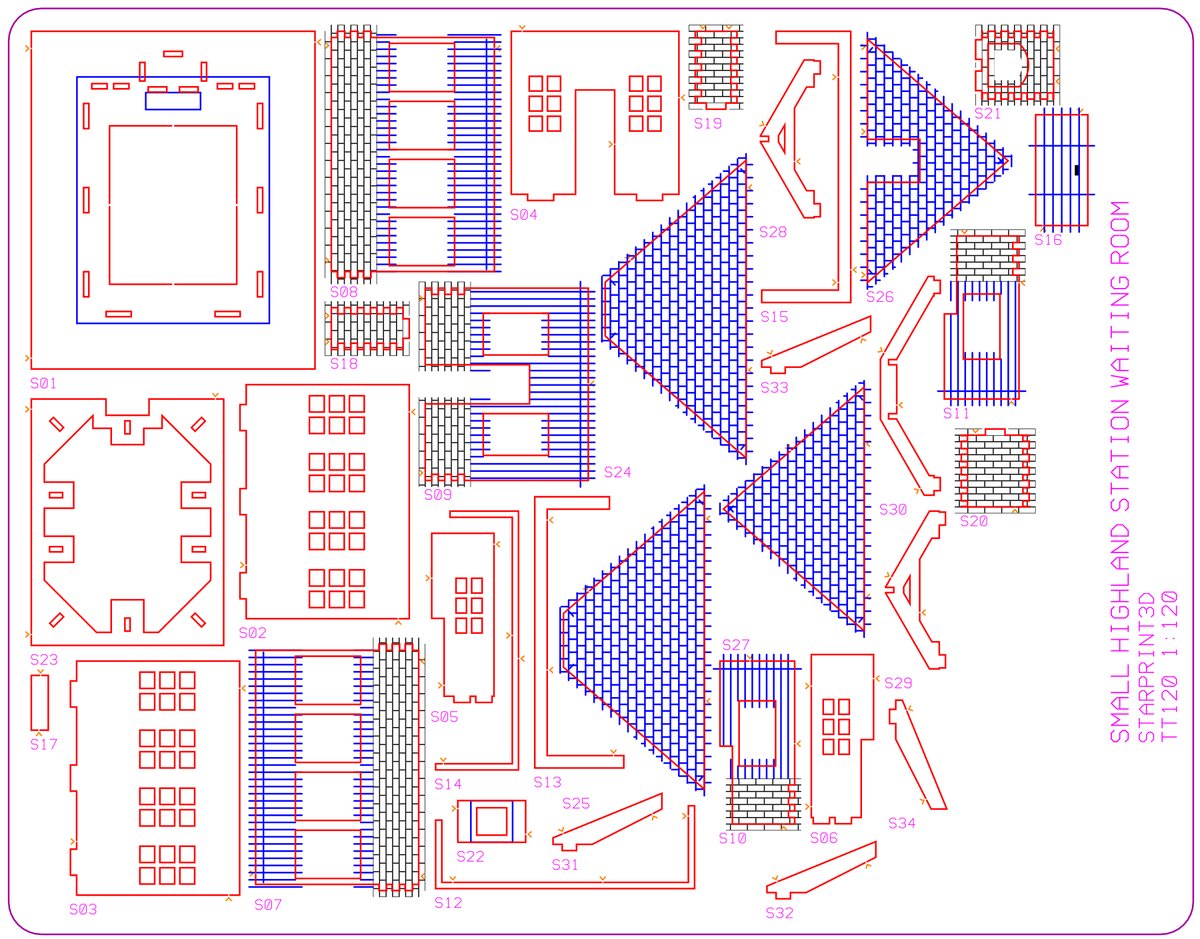
Check the sheet against the parts map. Every part is engraved with its number (S01 to S34), and the steps use those numbers. The glazing card carries panes G01 to G06, and the resin chimney stack comes separately.
Free parts with a sharp scalpel. Cut the small bridges on the waste side, then sand the nub flush.- Step image from the instructions PDF
Glaze the inner sheets, flat
Before assembly, lay each pane on the inside face of its glazing-bar sheet and glue it only in the solid margins above and below the windows.
Use canopy glue or PVA. Superglue fumes fog clear parts. - Step image from the instructions PDF
Hearth and chimney base
Glue the hearth to the floor plate, then build the chimney base on it. The brick combs interlock course by course.
- Step image from the instructions PDF
Walls into the floor
Push the inner sheets' tabs into the floor plate, then glue the outer skins on. At the corners the brick combs lock the walls square.
Hold each corner against a small square while the glue grabs. - Step image from the instructions PDF
Sills, wall plate and roof frame
Fit the sills, wall plate, cross rafters, ridge piece and hip rafters.
Roof panels, then drop in the resin chimney
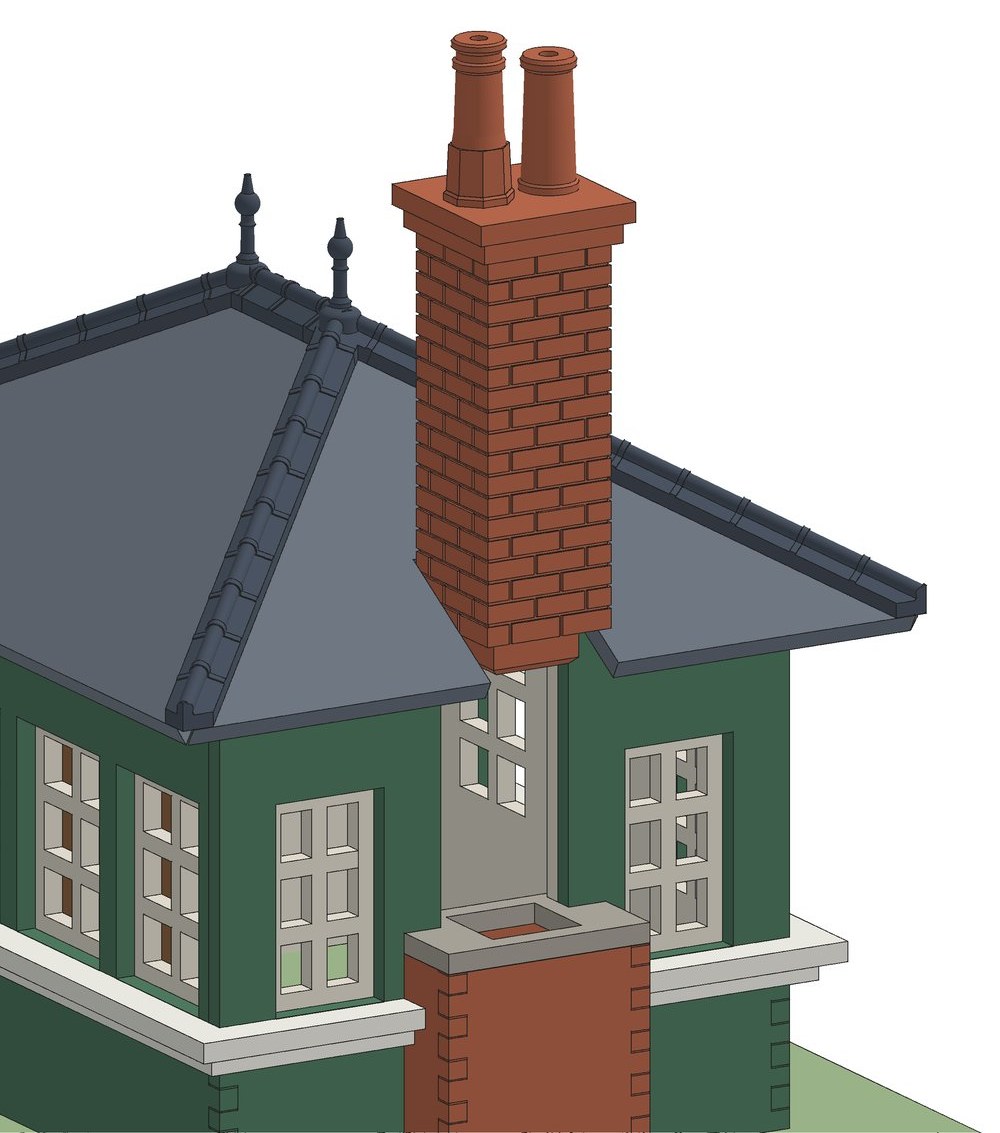
Glue the roof panels on. The resin stack goes in last, from above, and its keyed spigot only fits one way round, with the pots on the ridge line.
Use a tiny drop of CA gel on the spigot. Let it cure with plenty of air around it before boxing the model, to avoid white bloom.
Painting
Painting guide
- Seal first. Seal both faces of thin parts while they're still in the sheet, and let them dry flat under a book.
- Brick: base coat in a brick red, then pick out odd bricks lighter and darker.
- Mortar: work thick beige or grey paint into the engraved joints, then wipe the faces clean.
- Slate roof: blue-grey, with pale grey dry-brushed on the edges.
- Resin chimney: wash, cure and prime it before painting. Add soot at the top.
- Glazing goes in after all the painting and weathering.
Full painting guide → Colour refs for this kit TBC
Tips & FAQ
Common questions
The chimney won't go in.
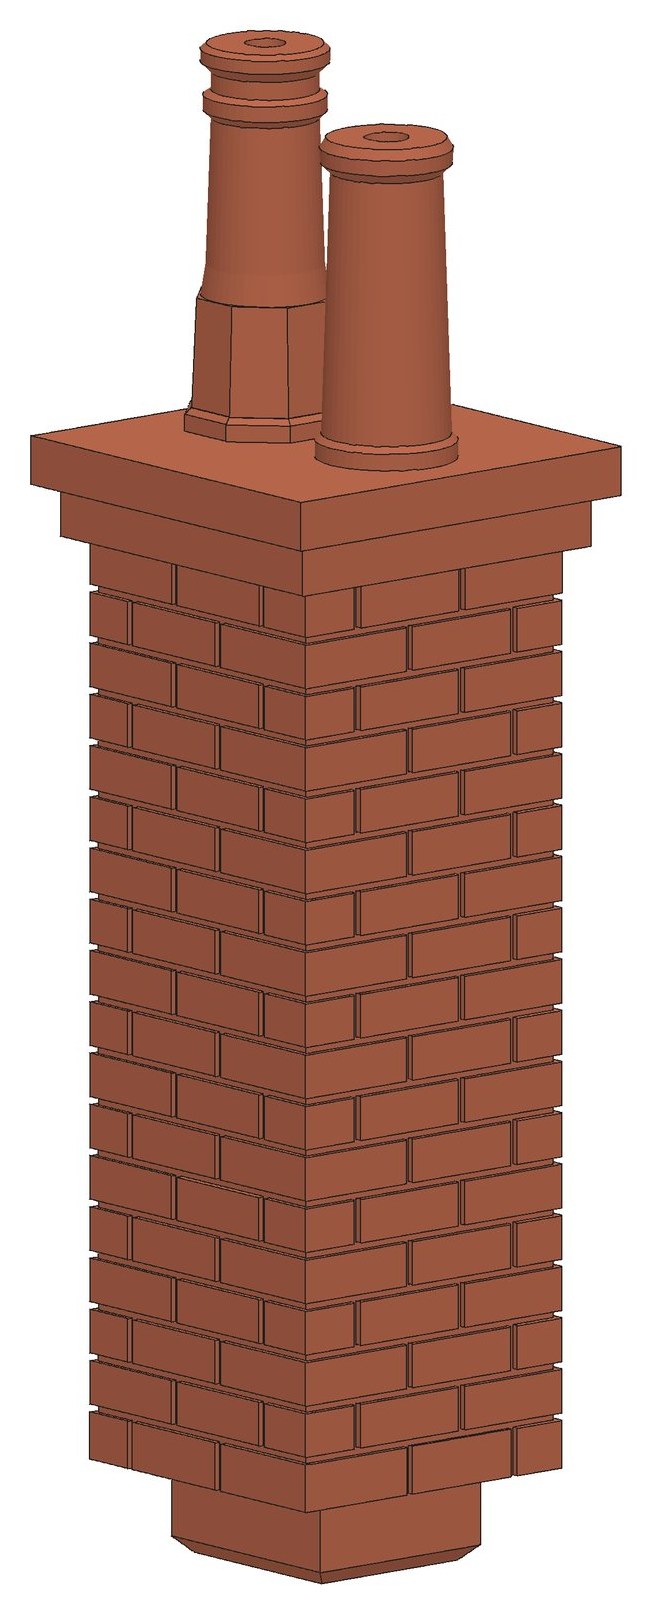
The spigot is deliberately not square, so it only fits one way. Turn it so both pots line up along the ridge.
Can I light it?
Yes. The floor plate has an optional knock-out panel held by 4 small bridges. Snip them to open the floor for lights or furniture.
My glazing has gone cloudy.
That's usually superglue fumes (bloom). Fit glazing with canopy glue or clear PVA, and keep CA well away.
I'm missing a part or one is damaged.
Message us through Etsy with your kit code and the part number (e.g. S12), and we'll send a replacement. Policy to confirm
Haven't got one yet?